
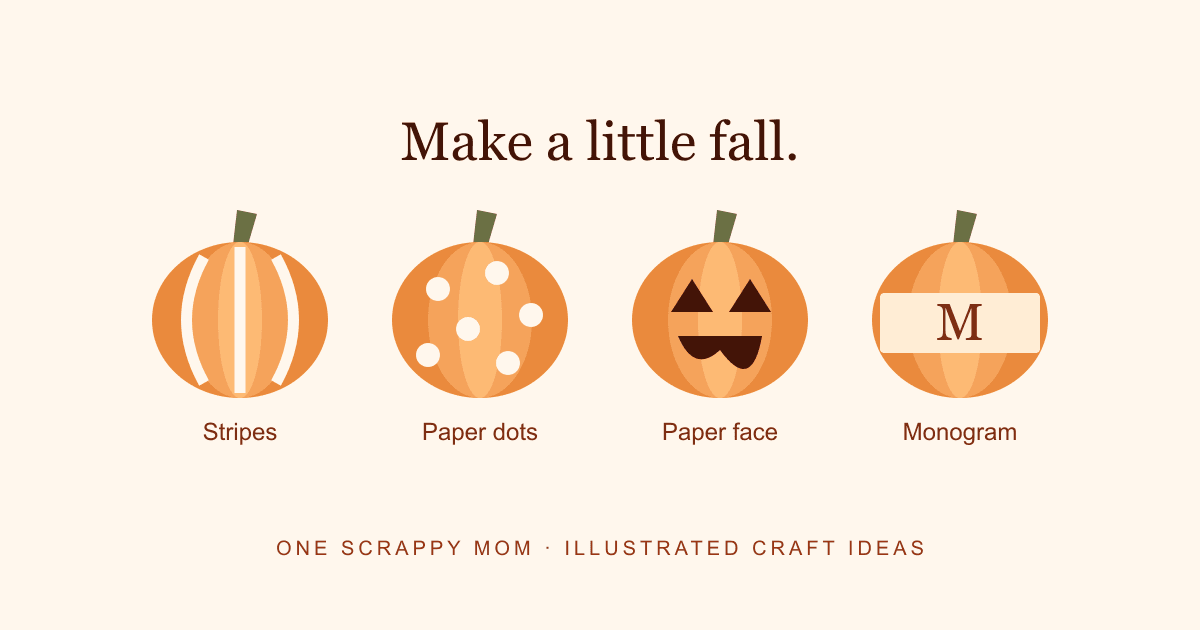
Foam pumpkin decorating can be as simple as painted stripes, paper dots, or a removable paper face. Choose a design first, check which materials suit your particular pumpkin, and test paint or adhesive underneath before covering the whole thing. No carving tools or elaborate shopping list required.
The useful part of a fake pumpkin is being able to put it away and bring it back next year. A removable design also gives you an exit strategy when someone's favorite color changes before October is over.
The designs below are original project plans with illustrations, not photographs of completed crafts. Use them as a starting point and adapt them to the pumpkin and supplies you have.
Before painting: what kind of fake pumpkin is it?
“Foam pumpkin” covers several craft products: exposed foam, foam with a painted outer finish, and hollow pumpkins with a harder shell. They don't necessarily accept the same paint or glue. Check the packaging or manufacturer's description before treating them as interchangeable.
For a paint project, start with a water-based craft paint labeled for the surface you have. Crayola lists several of its paints and paint sticks for real and fake pumpkins, but also recommends testing first. Its advice doesn't guarantee adhesion on every glossy coating.
Basic supplies
- A clean, dry craft pumpkin with an intact surface.
- Suitable paint and a soft brush, or colored paper for a paint-free design.
- A protected work surface and a scrap sheet for planning.
- Scissors for paper shapes, with adult help as appropriate.
- Surface-compatible removable adhesive if you're adding paper.
- A place where the project can dry undisturbed.
Keep small loose decorations away from babies and children who mouth objects. Choose age-appropriate art materials and supervise crafting. These pumpkins are decorations, not toys or food containers. The projects here don't require pins, carving knives, hot tools, or real candles.
Test before committing
Try a small amount of the chosen paint or adhesive on the underside. Let it dry for the product's stated time, then check whether it rubs off, damages the finish, or leaves unwanted residue. For a removable project, test removal too. If the finish fails the test, switch materials or use a loose paper band rather than covering the problem with more coats.
Six foam pumpkin decorating ideas without carving
1. Follow-the-ribs stripes
Choose two colors: the pumpkin's existing color plus one paint color. Brush a narrow stripe down every other groove, following the shape from near the stem toward the base. Leave enough of the original finish showing that you don't need to paint every square inch.
Use thin coats and let each coat dry according to the paint instructions. A thick stripe may look quicker but is harder to handle without smearing. This design is a good fit for pumpkins with clear molded ribs; on a smoother shape, sketch the spacing on paper first.
Make it simpler: paint only the front-facing ribs and use the unpainted back against a wall.
2. Big paper polka dots
Cut several large circles from colored paper. Lay them around the pumpkin before attaching anything so you can adjust the spacing. Use your tested removable adhesive and press gently without denting the surface.
Larger dots mean fewer pieces to attach and remove. Choose two dot colors if you want a coordinated look without measuring a precise pattern. Some adhesives aren't truly removable on painted foam; that underside test is what tells you whether this design is reusable on your pumpkin.
Make it simpler: put the dots on a paper band that wraps loosely around the middle instead of adhering them to the finish.
3. A paper jack-o'-lantern face
Use the printable template below or draw two eyes and a mouth on scrap paper. Hold the pieces against the pumpkin before cutting the final version. Wide shapes sit more easily across curved ribs than lots of tiny details.
Attach the paper pieces with the adhesive that passed your test. For a reversible look, put a cheerful face on one side and a sleepy face on the other. There is no need to cut into the pumpkin or light it from inside.
Make it simpler: use two large oval eyes and one curved mouth. Recognition does not require perfect symmetry.
4. A paper-collar monogram
Cut a broad paper strip long enough to wrap around the pumpkin's middle with a little overlap. Write a large initial, a short word, or a family nickname on the front. Fasten the paper to itself rather than gluing it to the pumpkin when the shape allows it.
The collar will sit differently on tall and squat pumpkins, so try it with scrap paper first. If it slides, make the band a little wider or place the pumpkin on a stable tray; don't reach for sharp pins to anchor it.
Make it simpler: one large initial is easier to read at a distance than a sentence in tiny script.
5. Painted arches and windows
On a light-colored pumpkin, paint a row of simple arches around the middle, leaving space between them. Fill alternating arches with a second color, or leave the centers unpainted. This gives a patterned look without needing tape to stick across every curve.
Start on the back to work out the brush width. Keep the first row simple rather than adding fine outlines immediately. A slightly wobbly arch still reads as an arch; don't keep layering wet paint to chase perfection.
Make it simpler: use one oversized arch on the front and leave the rest plain.
6. A coordinated three-pumpkin display
If you already own several pumpkins, repeat the same two colors rather than putting every craft supply on every pumpkin. Try stripes on the tallest one, a paper face on the middle one, and a monogram on the smallest.
Place them on a stable shelf or tray with the tallest at the back. Don't stack pumpkins where a child or pet could pull them down. A coherent group can come from repeating colors, not buying matching new decorations.
Make it simpler: use just two pumpkins and leave one undecorated. The plain one gives the patterned one room to stand out.
Free printable pumpkin face template
Download the original pumpkin face template, or open the printable in a new tab. Use your browser's Print command and choose “fit to page.” Test the size on scrap paper before cutting your final shapes.
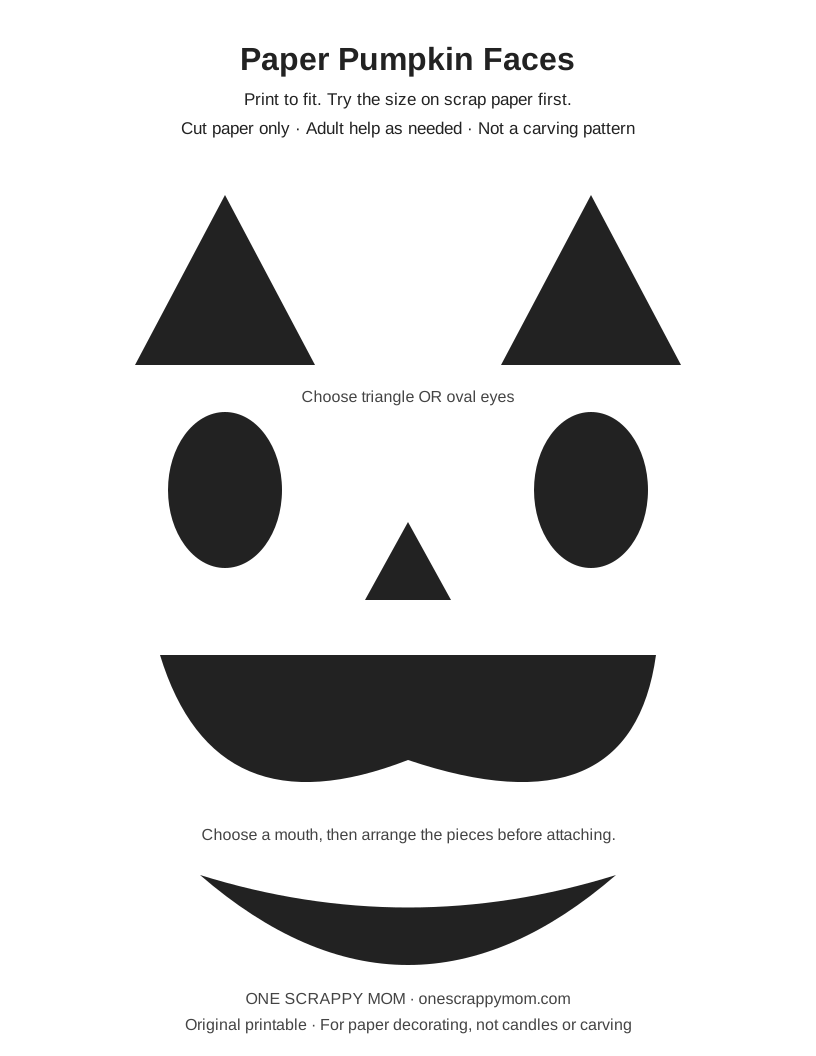
The template includes triangle eyes, oval eyes, a nose, and two mouth options. Cut out the shapes and arrange them on the front of the pumpkin first; you do not need to use every piece. It is a paper decoration template, not a carving pattern. Adults should handle cutting where needed.
For another simple paper activity, the bunny coloring page stays useful outside pumpkin season.
Why isn't the paint or glue sticking?
Foam pumpkin paint and adhesive troubleshooting
| Problem | What to try next |
|---|---|
| Paint beads on the surface | Stop and check surface compatibility. Do not keep layering over paint that will not adhere. |
| Paint rubs off after drying | Check the stated drying or curing time; if adhesion still fails, choose a compatible product or a paper design. |
| Paper corners lift | Use larger, simpler shapes or the paper-collar approach. Curves are harder for detailed flat cutouts. |
| Tape pulls away the original finish | Stop using it on that pumpkin. Removable is not a guarantee for every painted surface. |
| The project stays tacky | Give it the full labeled drying time in a suitable space. Do not box it up or apply heat to rush it. |
Don't use spray paint, solvents, or a sealer on unidentified foam without explicit compatibility instructions. A coating can react differently from the material beneath it. You don't need a clear topcoat for a simple indoor display unless the chosen materials call for one.
Can decorated foam pumpkins go outside?
Doing more than one craft at the table? For a different kind of mess, see Play-Doh removal from carpet or slime removal from clothes. Don't transfer a paint-cleaning method to dough or slime without checking the product and surface.
Not automatically. The pumpkin, paint, adhesive, and paper all need to be suitable for outdoor use. Crayola recommends indoor display for its painted pumpkins because moisture can affect water-based finishes. A covered porch still exposes a project to damp air and changing conditions.
For these projects, plan on an indoor display away from heaters, flames, and places where decorations could be knocked down. A no-carve design doesn't require lighting inside the pumpkin.
Before storing, let everything dry fully and remove paper pieces if you want to change the design next year. Pack loosely so surfaces aren't pressed together. Keep reusable face pieces in a labeled envelope and put a scrap-paper note in the box recording which paint or adhesive worked on that particular pumpkin. Future you gets to skip the guessing.
Frequently Asked Questions
What paint can I use on foam pumpkins?
Can I decorate a fake pumpkin without painting it?
Do foam pumpkins need primer?
Can I use these ideas on a hollow plastic pumpkin?
Can children decorate foam pumpkins?
How can I reuse the same pumpkin next year?
Pick one design and stop there
Start with stripes if you want to paint, or a paper face if you want less cleanup. You can add another pumpkin later; the first one doesn't need six techniques to count as finished.
For a low-key craft afternoon, pair the project with the Orange Julius recipe or plan dinner with the frozen-meatball sauce guide. Keep the art supplies on a separate surface from food preparation.
Source checked September 6, 2026: Crayola's pumpkin decorating guidance. Design ideas and the printable are One Scrappy Mom originals; follow the current labels on your own materials.